How To: Eyebrow Micro-Pigmentatio
In this tutorial, we show you an eyebrow micro-pigmentation process in action. This video was provided by Mrs. Nika Mahdavi. To join our classes, please contact us at .
Instructions:
Greetings. I am Nika Mahdavi and today I want to show you an eyebrow micro-pigmentation process from Rojelab.net.
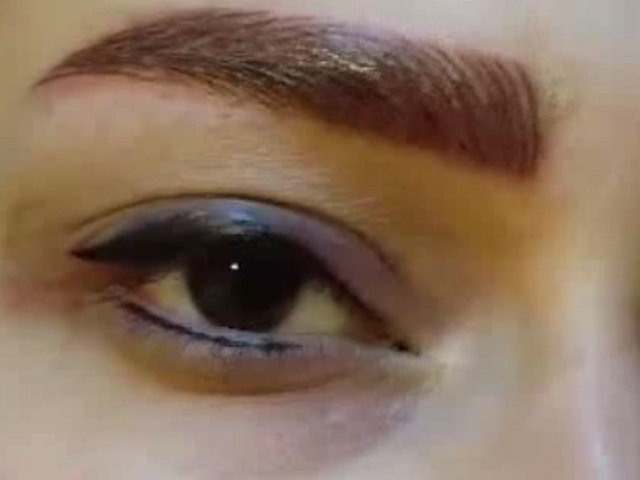
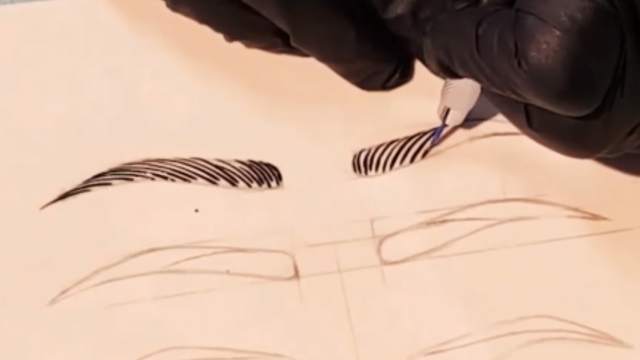
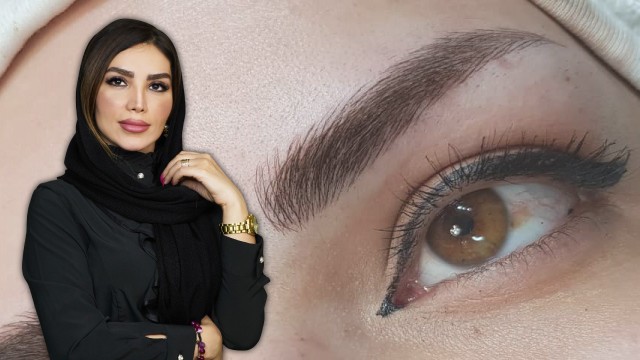
What you see here is a natural eyebrow but based on client request we want to redesign it with attention to design methods and standards. Before starting the process, we have to clean the area of operation with a piece of cotton smeared in sterilizing the material. We will design the eyebrows based on the existing design standards and what the client has requested, and if the client approves the design, we can move on to the micro-pigmentation process.
Unlike most eyebrows, which have straight hair on the crown,
This eyebrow has a crown with diagonal growth and the client has requested that we change the eyebrows on this area and across. We will design the eyebrows first, and if the client approves of the design, we will continue with the process. The crown is round, the hair leans diagonally to the side, and since the client requested,
We want to change this design and make it look rectangular and straight up. When the client approves our design, we can start working. We should always design the eyebrows before proceeding any further.
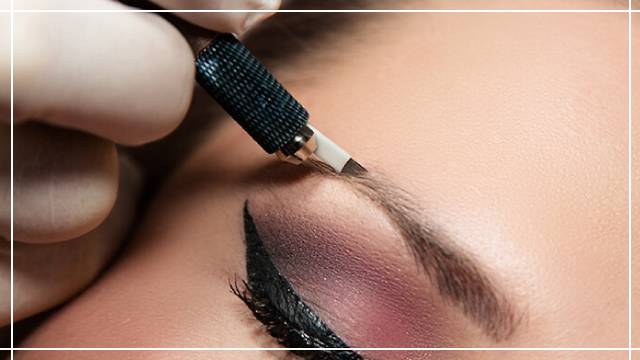
For this process, I am using the number five slope cartridge. This is since my client would like the hachures to be very thin so the result looks more natural and hence I would recommend the number five slope cartridge. To design the model we have to pay attention to a few key standards of eyebrow design. The standards of culture, fashion, and what the client prefers can affect the standards. From my point of view, the character of the client also plays a key role. After the design phase, remove excess hair, clean the area, and let the client see the result and continue only after their approval since changes in the appearance can sometimes be hard to accept. Always keep in mind that the point of this change is to make the client more beautiful, not unorthodox.
As I explained before, you should take care to implement all the required hygienic steps, first for the safety of the client, and then yourself. It is to the benefit of both parties if we apply the correct hygienic standards, as I explained in the previous videos and for the purpose of this video, we have omitted this part. All the tools you use should always be sterile and one-time use only. After designing the first model, always let the client see the result before moving to the other eyebrow to prevent any unwanted changes or redesign. After designing one eyebrow, let the client see the design and approve it and if they like, you can then make changes. Please look at your eyebrows and tell me if I can move on to the other one.
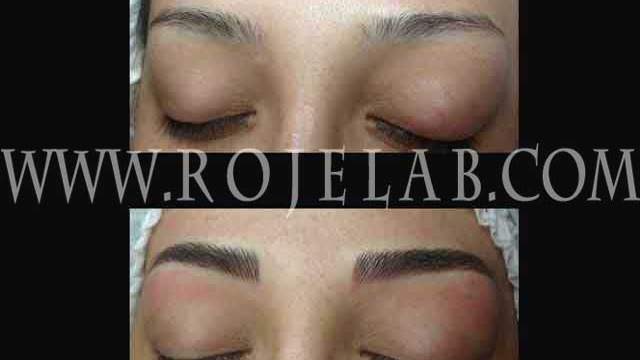
Eyebrow pigmentation process takes two to three sessions if the client has natural eyebrows. In the first session, we focus mainly on the design and the color the client prefers. Since we have no idea about how the pigmentation will take place on the skin, during the second session we can analyze and check the skin and if the client wants, we can make the color darker or lighter. Therefore, the first session our focus is mainly on the design and in the other sessions,
We can focus on making the pigmentation lighter or darker. You should be very careful while designing the second eyebrow to make sure it is identical to the first design from the perspective of the angles, the length of the crown to the arch, and arch to the tail of the eyebrow. You should also consider how the client would look with the new eyebrows when sitting down because the face muscles change when you are lying down.
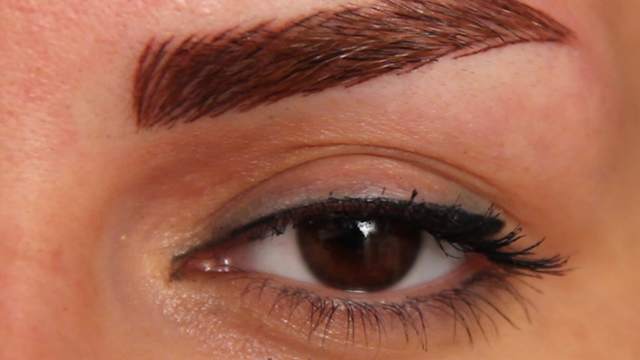
One of the most common issues people have after eyebrow design and pigmentation is that the eyebrows look thicker than what they had in mind. You should keep in mind that when you design the eyebrows using a pencil, the eyebrow is unified and there is no space between the hair follicles and hence the eyebrow looks a little thicker. This will change when we pigment the eyebrows. I have designed both eyebrows according to the design standards and the client approves of this design. Always keep in mind that culture and fashion can affect our design. You should consider this without making the face look weird. Since my client dyes her hair light, and her eyebrows too and usually prefer lighter colors, I am going to use a light brown color for her eyebrows.
Aside from the established standards and what you learn in classes, you should also remember that each person has different eyebrows with different hair patterns and your design should not differ very much from the natural growth form of the eyebrows. This will help make the design look more natural. As time goes on, people lean more and more towards cosmetic procedures that look more natural the same thing is true when it comes to eyebrow micro-pigmentation. You should know the natural pattern of the hair on the eyebrows and how you want to design them. After designing the eyebrows and implementing a basic pigmentation, you can remove the design, apply anesthetics and then continue the process. This process can sometimes be a little painful depending on the skin and how pain tolerant the client is.
After scratching the skin, the anesthetic will affect the area much faster. Since we have already applied our basic model to the eyebrows, I can apply the anesthetics. Wait for two minutes for the anesthetic to take effect. Pain tolerance and skin type have a great effect on how uncomfortable this process can make the clients feel. Usually, clear skins feel less pain and oily or dry skin types consistently feel more pain. After applying the anesthetic, one of the main factors which show the skin is numb is the formation of a white area around the eyebrows, which is caused by the epinephrine in the anesthetic. However, generally waiting two minutes for someone with scratches on their skin is enough.
Keep in mind that this process should not be too painful and there should be no bleeding involved because the process takes place near the epidermis where there are no blood vessels and hair roots. You should be careful not to damage the hair roots or blood vessels. Besides, blood will decrease the skin’s ability to absorb the color pigments. So be careful not to go too deep because you might cut the blood vessels and decrease cause issues with the pigmentation process. Make sure to remove the anesthetic material before starting the work again. If you want to re-apply your hachures, always make sure to apply them directly on the previous ones to preserve the delicacy of the lines. Besides the skin type, the ink also plays a critical role in how much effective pigmentation process is. The lighter the colors are, the less durable they will become.
My client is young, almost twenty-four years old, which means meiosis takes place rapidly across the tissues. We have also chosen a light color for the pigmentations so the client will have to dye their eyebrows constantly and the oxidant in dyeing products can remove pigments faster. All these factors can reduce the durability of the process. Generally, you will have to refer to your pigmentation artist for a restoration process every six months to one year and if you have a client with similar conditions to mine, they will probably need to restore their pigmentation closer to the six months rather than one year. People going through the micro-pigmentation process should remember the restoration process could vary depending on the color they choose. If you choose a light color, you should not expect the pigmentation to take effect with one session. For this client, for example, we have many factors, which can reduce the durability, including light color for the pigmentation, young age, skin with open pores, and dyeing for which she will need to use oxidant. So you should let the client know that the pigmentation will reduce in color may be up to sixty or seventy percent in some areas more and in some areas less. You should let your client know that you can fix these problems during a restoration session. How many hachures you apply to the eyebrow depends on the natural density of the eyebrow.
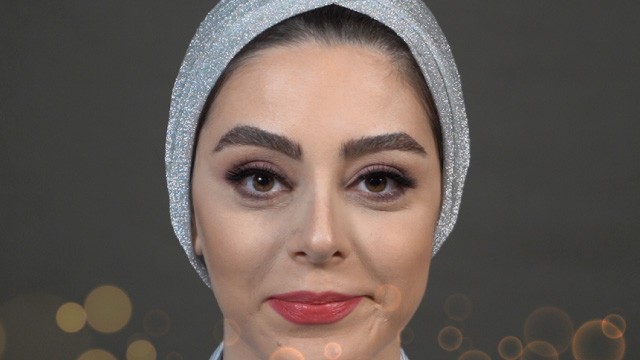
If the eyebrow has a very low volume, you can apply the hachures further from each other. However, my client has eyebrows with a high volume therefore, it’s much better if we draw the lines close to each other to blend in with the natural eyebrows. What we intend to do during a micro-pigmentation process, is to create lines similar to natural hair to increase beauty and harmony. Be very careful and always try to deliver your best work because the client will have to live with the results for a long time. The density of hachures for the tip of the eyebrows should always be less than the rest.
My work here is finished. I hope you have enjoyed this tutorial.