How To: Apply Dry Contour & Highlight
In this tutorial from Rojelab.net, we teach you all about applying a dry contour.
Instructions:
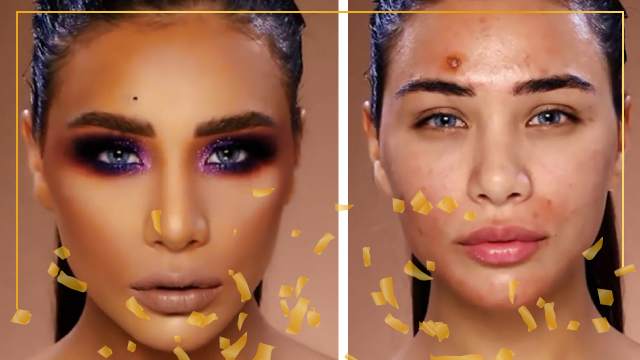
Greetings. I am Dorsa from Rojelab.net. Today I want to show you the correct way to apply contour to your face. We are going to talk about dry contour using Grimas products.
To contour my face I will use eyeshadow and pancake. For the highlights, I am going to use a light color. Pick some of the material, put it on the palette and then fix them together. You can change the tone of this mixture depending on your skin color. I will mix these and then apply the mixture to my face. This will cover the highlights and for the contour, I will use the darker tone of this same color spectrum. I will use this tone for the contour.
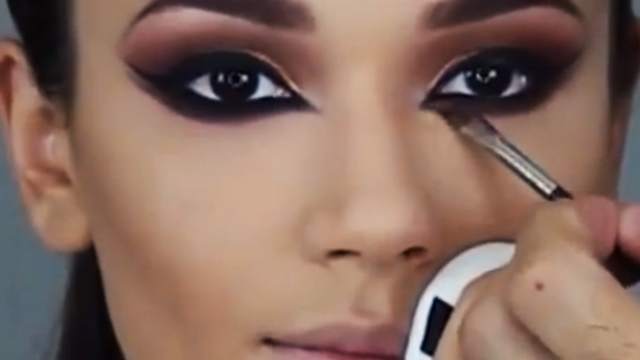
For the contour process, I need two different brushes. I will use one for the highlight and one for the darker shade or contour. This way we can prevent the colors from mixing with each other. I am going to start with the dark shade first. I will smear the brush in the material, and remove the excess. Now, using my thumb and palm of my hand, I will find the cheekbone and then apply a dark shade directly on the area. I will extend the line until below the cheek in the shape of the semicircle. Now I can fade the line.
Use your brush to fade the lines thoroughly. I also applied the shade to the other cheek and faded it. In a dry contour, it is much better if the lines are faded especially if you want to apply a casual makeup. Without the lines, the makeup looks much more natural. After fading the previous lines, apply some of the dark shade below the lower lip to add some volume to the lips. If you have a long forehead, you can apply some of the dark shade to the hair growth line on the top of the forehead and then fade it.
Now we can move on to apply the highlights. I will pick my clean brush, smear it in the light powder, and apply it above and below the dark line, I added on my cheekbone. Now I will remove the excess material from the brush, start fading the makeup and hide the lines between the two shades. Applying contour depends on the type and shape of the face, but it always follows a fixed rule. You apply dark shades where you want the face to look smaller or add an angle, and apply the light shade to the areas you want to make more visible.
You can use a pad to remove any existing lines and make the makeup unified. Now let’s apply the highlight to the nose. I will smear my brush in my highlighting powder and remove the excess. Apply the powder to the side of the nose and extend it until you reach the top of the cheeks. Applying the shade like this will help the nose look smaller when viewed from the side. Apply some of the highlighting powder to the top of the nose. Use another brush to apply the dark shades.
Take some of the powder and apply it to the area. How you apply the powder defers from one person to another. If you have a short nose, you can start the line from the top of the nose and if the nose is a little longer, you can start the line from the middle. Continue this line until the tip, round it up on this area and then fade it. After fading these lines thoroughly and reaching a unified makeup, our work is finished. This is how to apply a dry contour.
I hope you have enjoyed this tutorial. Please tell us what you think in the comment section. Until next time, goodbye.